Logistics
This section covers shipment and container details management workflows that are also available from the Work Order view, and the miner handling features that are relevant for logistics.
Shipments
In the shipments table, you'll see all the existing shipments along with their customer, Work Order, number of containers, and status. You can filter them by several fields, and view the tracking info by hovering over the icon on the right.
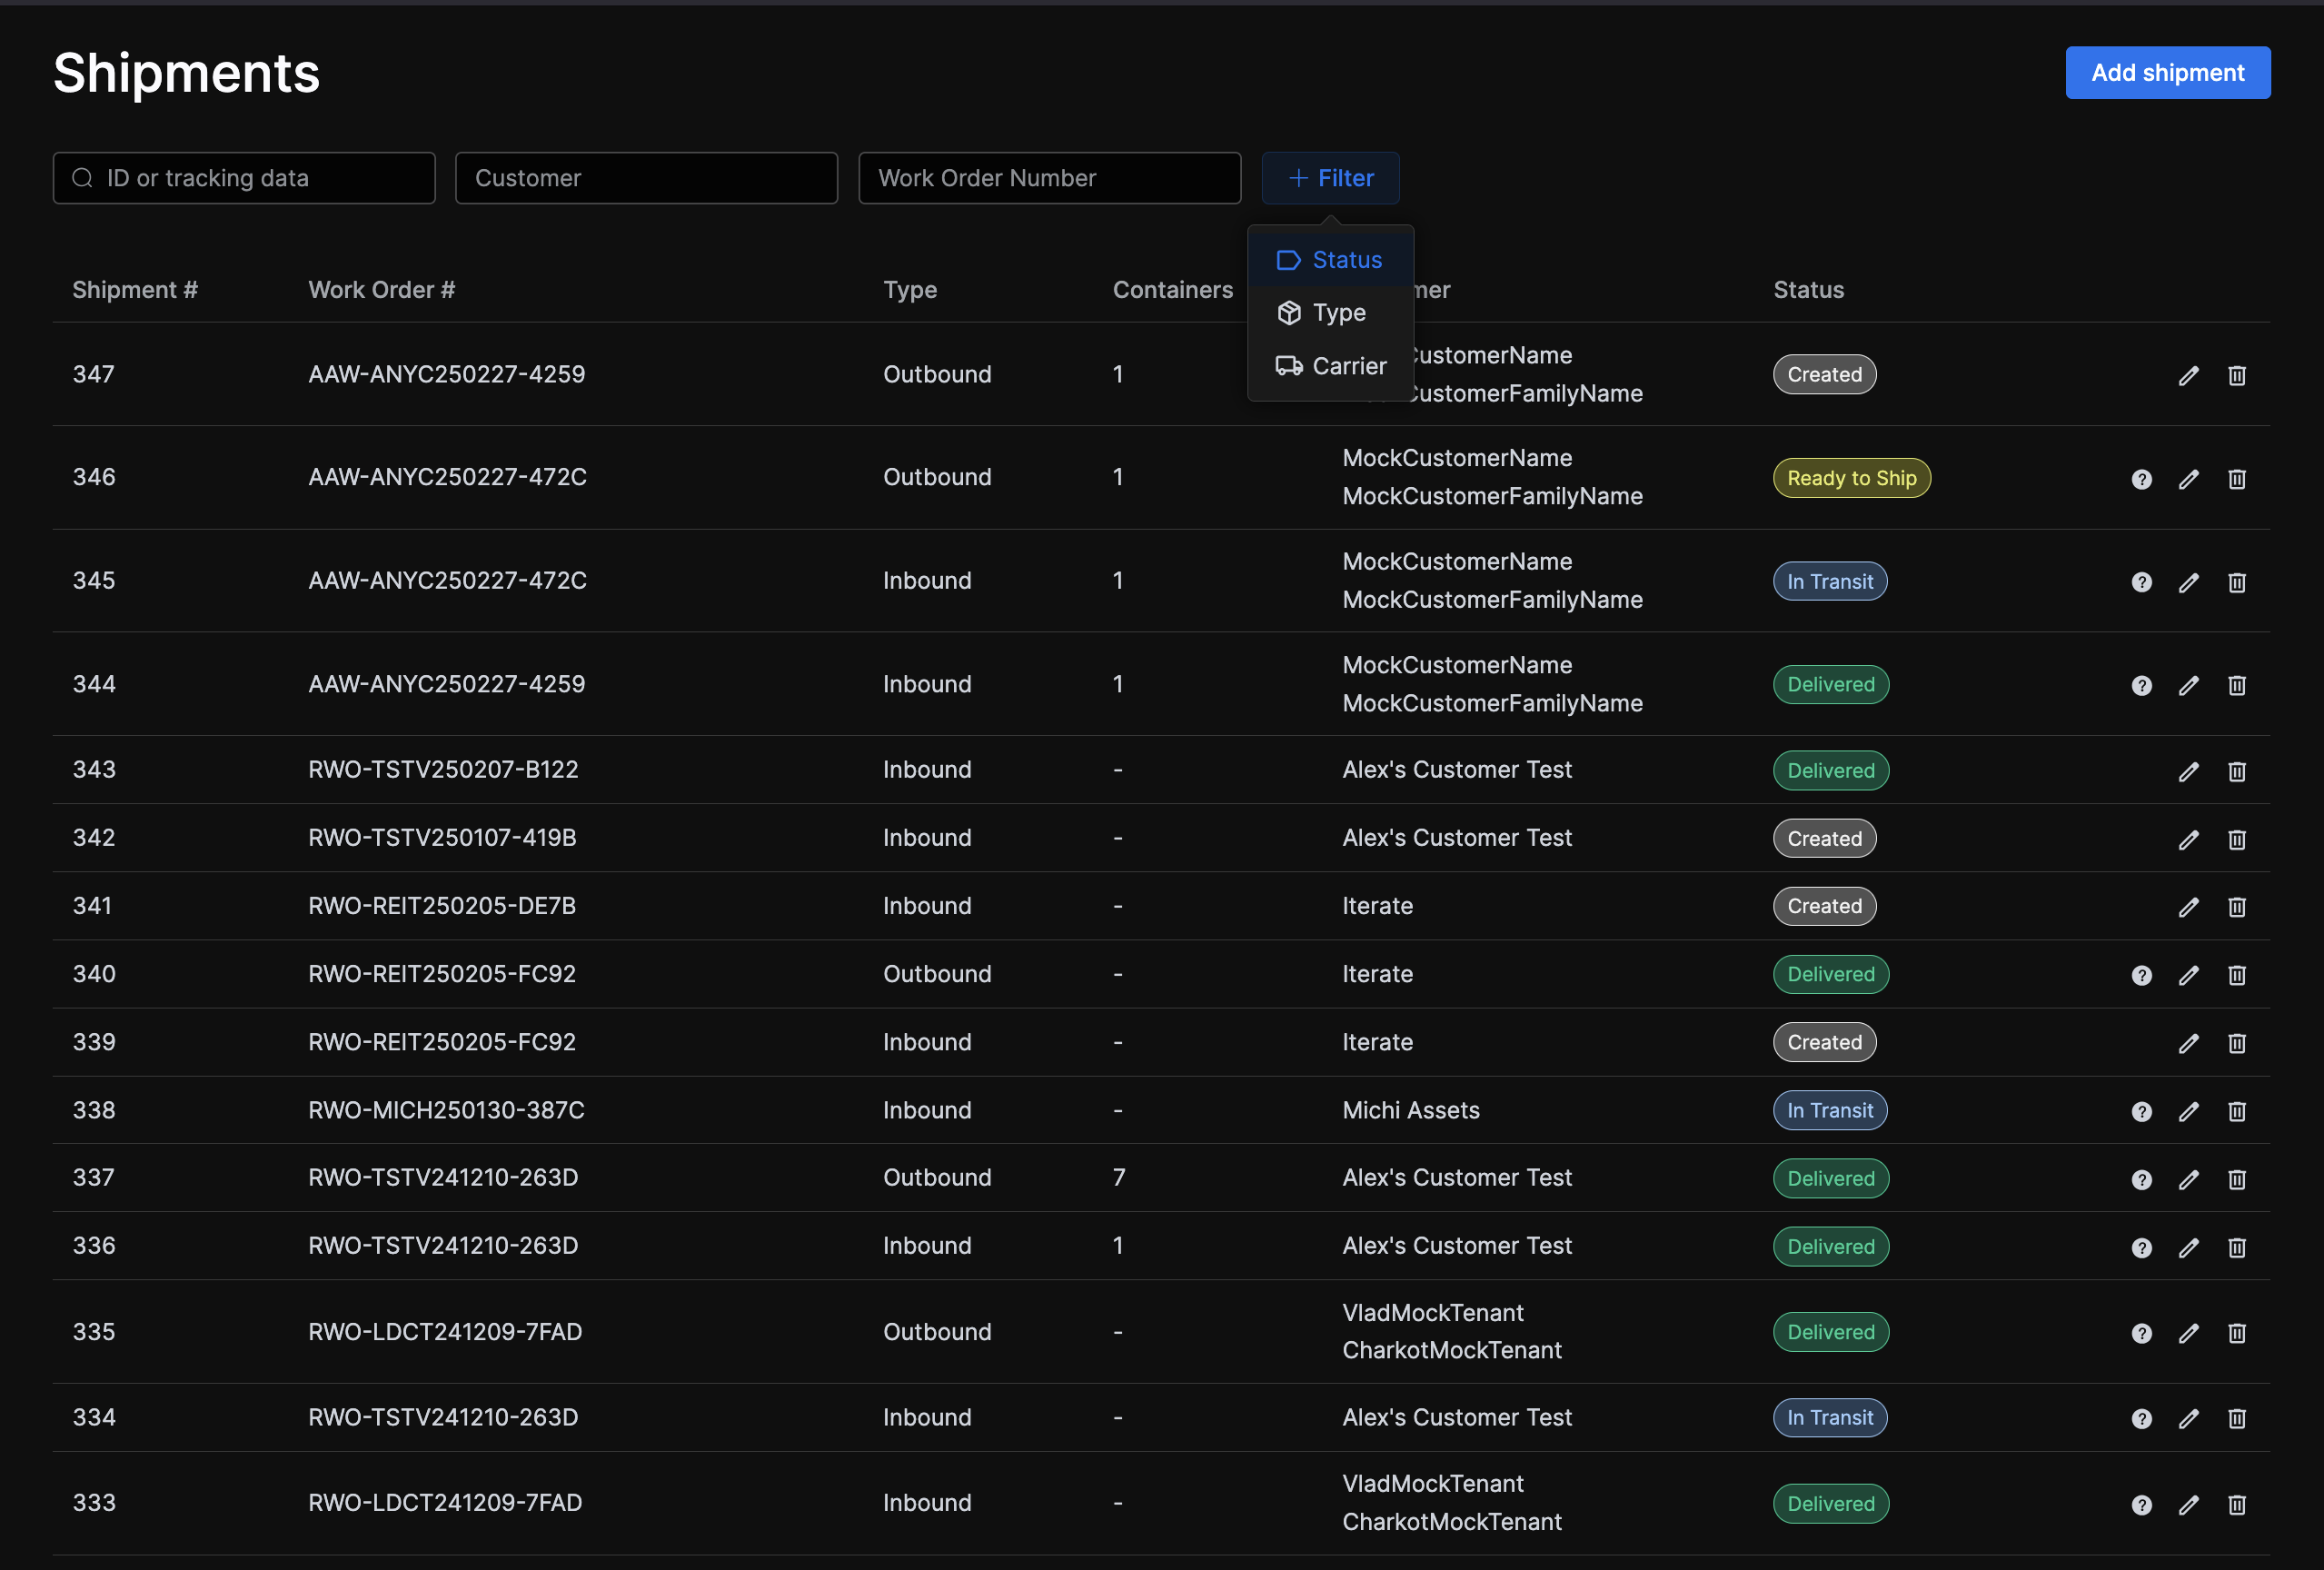
Shipment status rules
Inbound Shipment
- Automatically created with the status
"Created" - When the tracking information is provided, the status updates to
"In Transit" - When/if the delivered date is provided, the status updates to
"Delivered"
- Automatically created with the status
Outbound Shipment
- Automatically created with the status
"Created" - When tracking info is populated, status updates to
"Ready to Ship" - When
"Picked Up date"is provided, status updates to"In Transit" - When
"Delivered Date"is populated, status updates to"Delivered"
- Automatically created with the status
Creating and editing
The Add Shipment button will display the shipment creation modal. Editing is done through the same modal, which is reachable both from the shipments table row and from the shipment details page. Omitting, adding, or removing shipment details will dynamically update the shipment status.
Note
When creating a shipment, ensure that you select the correct type (inbound or outbound), as it cannot be modified afterward.
Details
Clicking a row navigates to the shipment details page, from where you can edit it and add containers to it.
The Add Containers button will bring up a modal where you can record any damages that could have occurred during shipment along with the base container data.
You can click the damage thumb to preview the picture along with its description and the "Export PDF" button to download as PDF in case you need to send it somewhere. Click on a container's row to navigate its details page.
You can access Work Order shipments from the Work Order Dashboard Logistics tab.
Containers
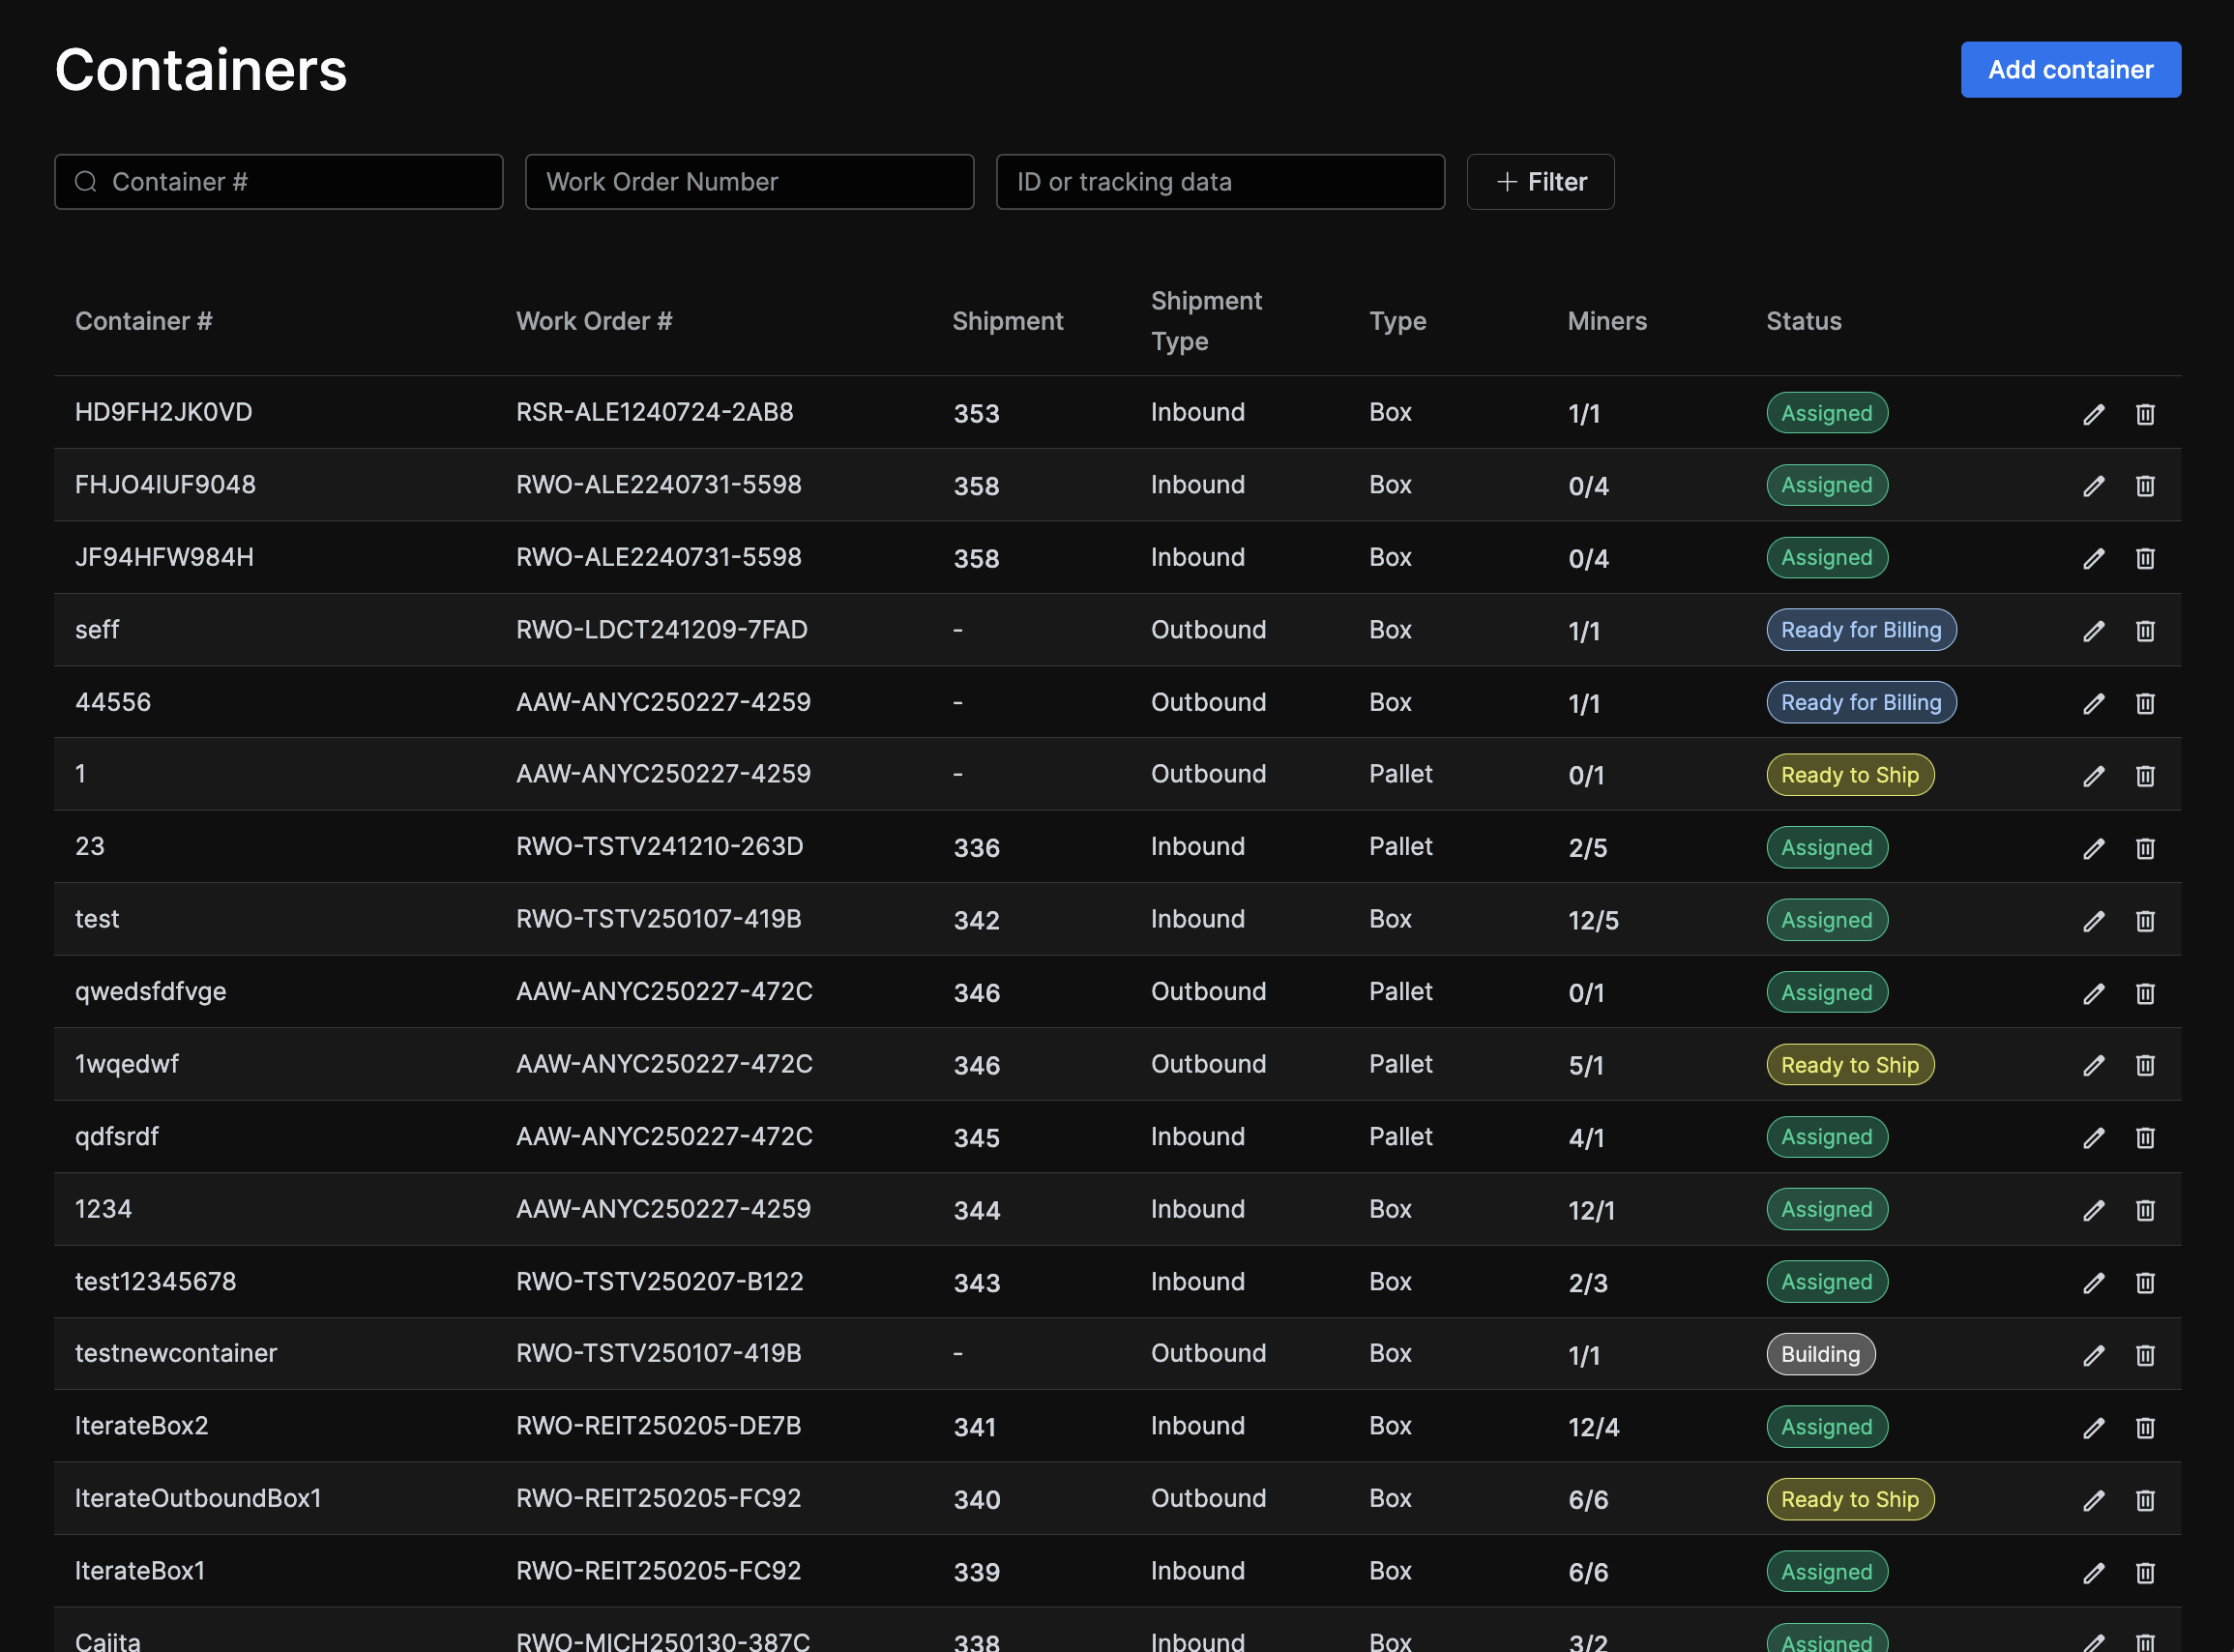
The containers table will allow you to view existing containers and create new ones.
Creating and editing
When creating a container, you'll have to provide the Work Order (they're always bound to one), and if it's an inbound container, the shipment as well. Outbound containers can be created outside any shipment and assigned to one when they're ready. Editing is done through the same modal, which is reachable both from the containers table row and from the container's details page.
Note
When creating a container, ensure that you select the correct type (inbound or outbound), as it cannot be modified afterward.
Inbound container miners are typically added later, as they're scanned. Outbound container miners are added from the edit container modal (the same used for creation), typically when building the container. These must be in completed state with no unresolved failures.
Container status rules
- Containers will start off in
"Building"state - After assigning all miners to them, they should be manually transitioned to
"Ready for Billing" - Once its associated invoice transitions to
"Paid", the container is automatically transitioned to"Ready to Ship" - When it gets assigned to a shipment, it moves to
"Assigned", which is a final status - Unassigning will bring it back to
"Ready to Ship"
Assigning
Containers can be bulk-assigned to a shipment. To use this feature, first apply the appropriate filters, then trigger the Assignment action. Since it's rather important that only "Ready to Ship" containers from the same Work Order and type (inbound/outbound) are assigned together to the same shipment, this requirement is enforced by requiring you to set these filters in order to display the bulk-assign controls.
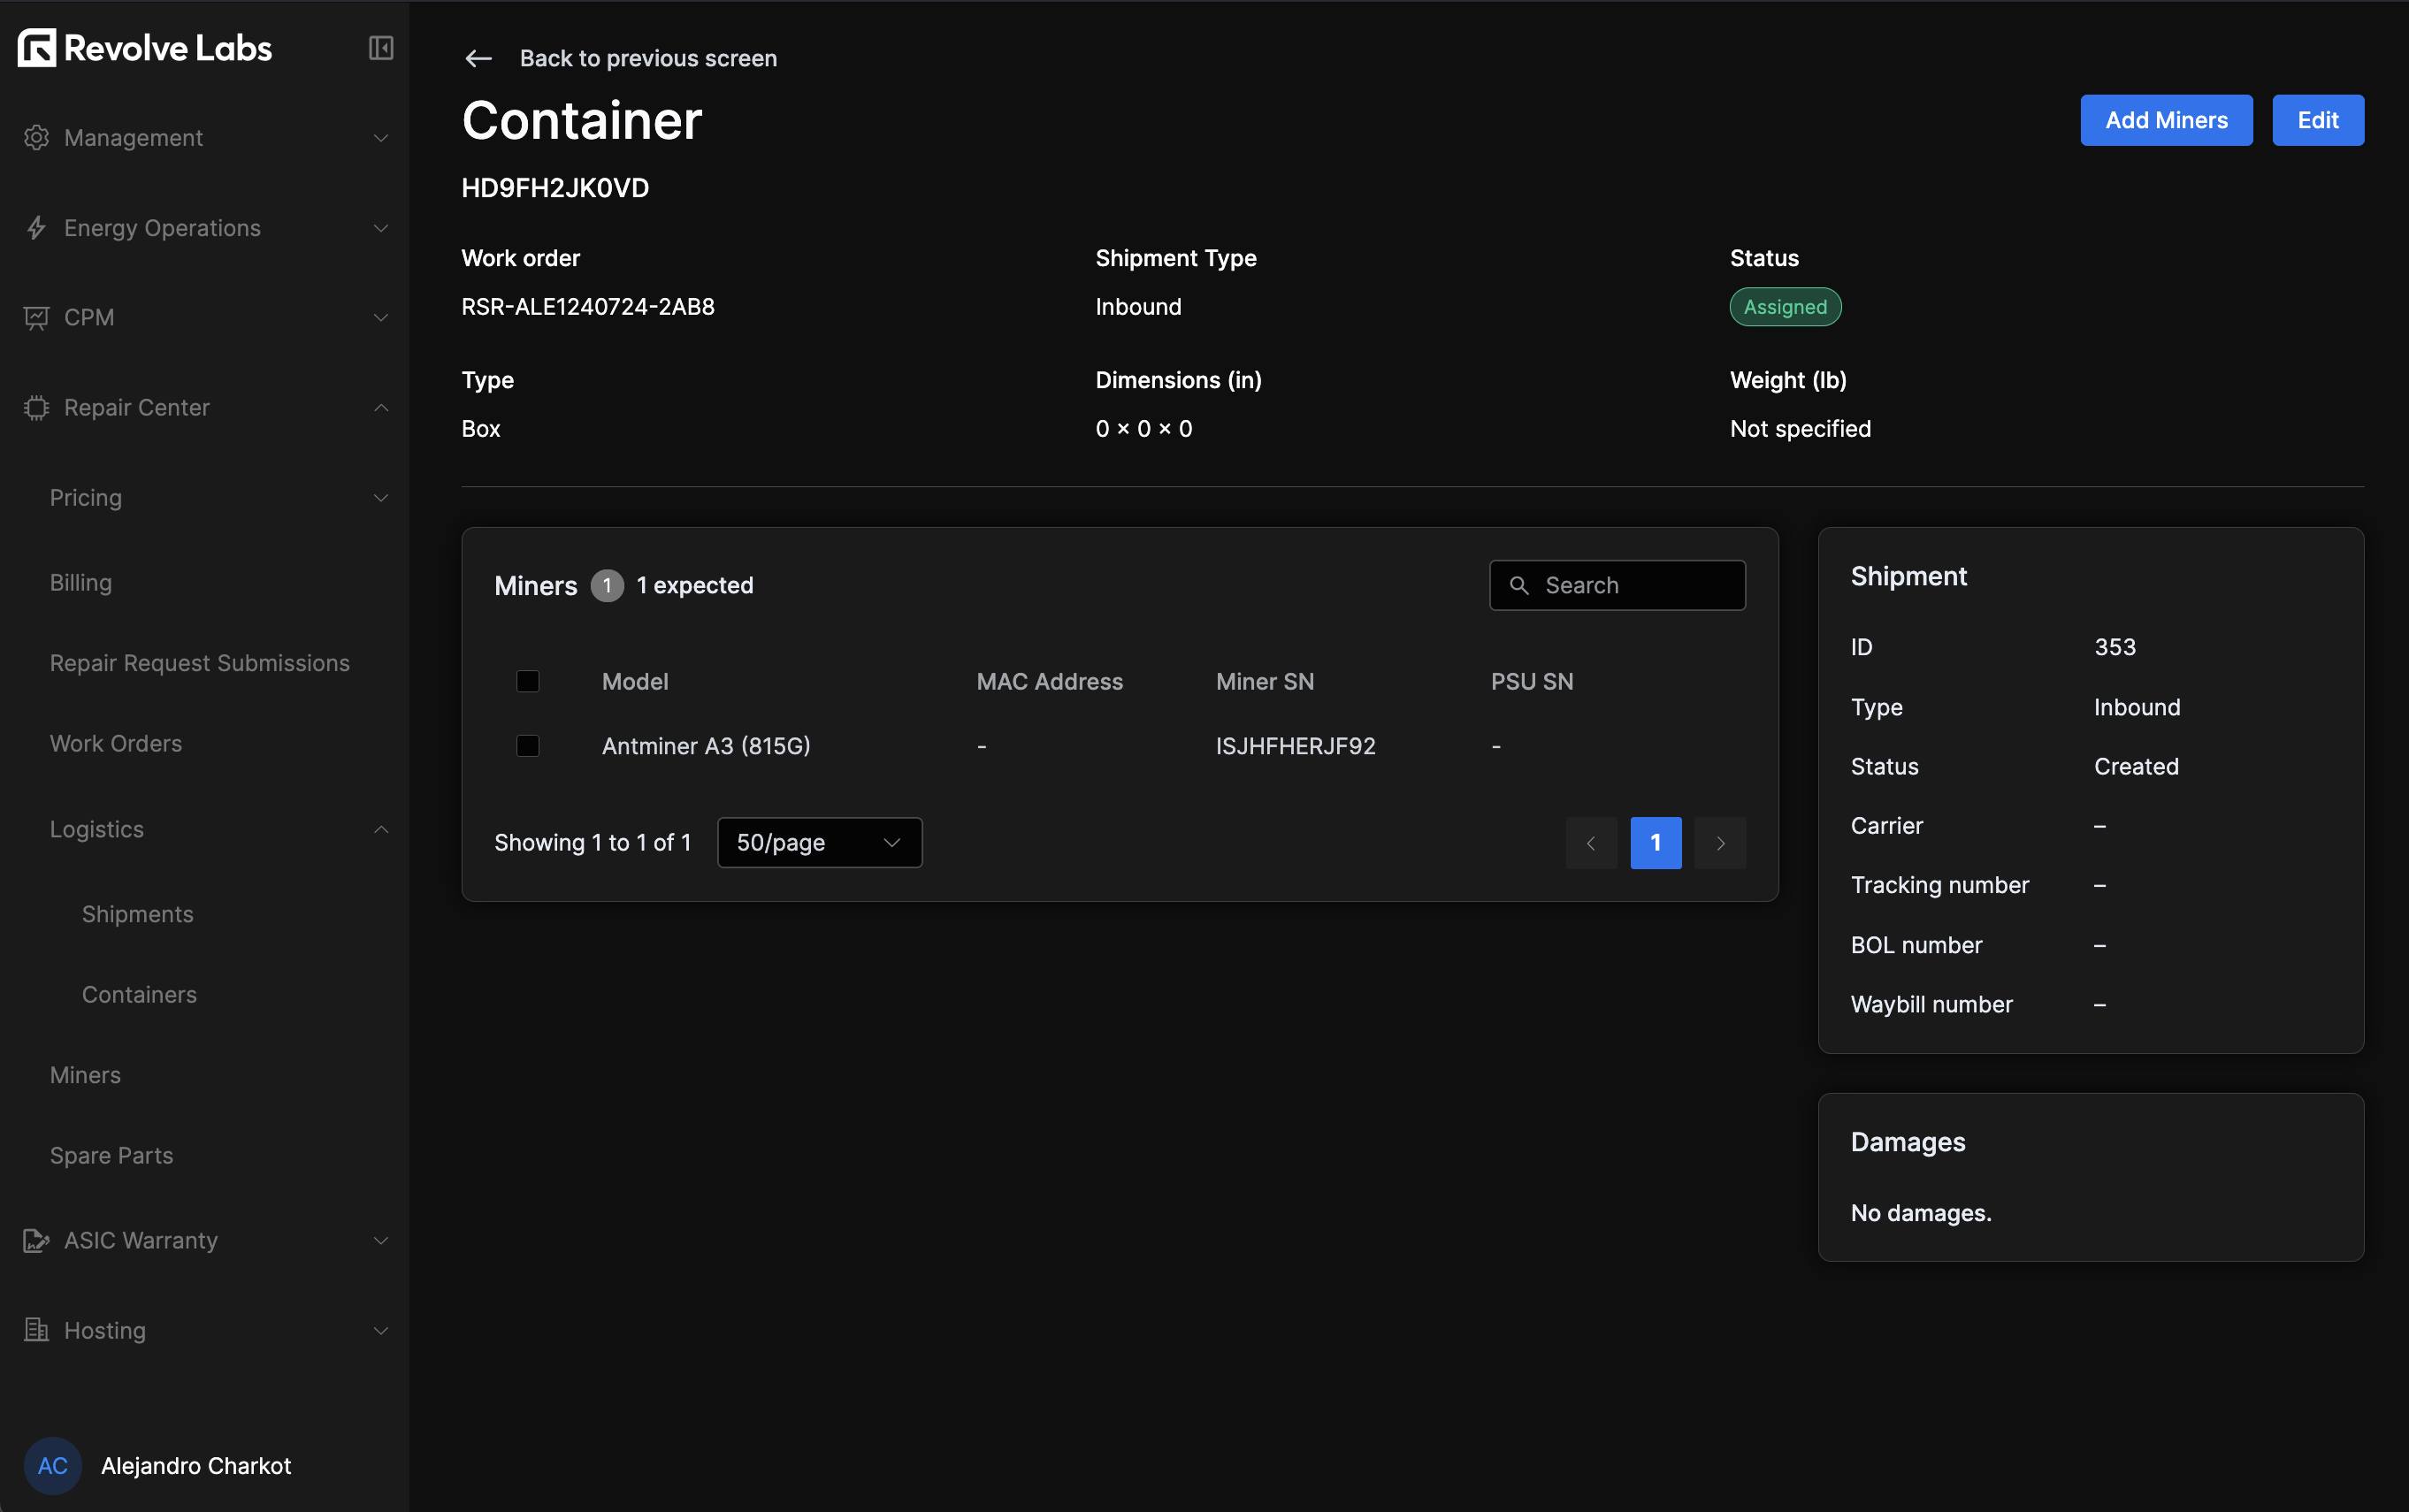
Details
By clicking any container's row, you'll navigate to its details page. There, besides the info set when creating or editing, you'll see the list of associated miners, and the Add Miners button if it's an inbound container.
You can also view and operate on containers from the Work Order Dashboard Logistics tab.
Miners
Note
This page presents miners handling features as they're relevant for logistics. Repair operations are discussed in the operations page.
Inventory
Miners are scanned into the system through the inbound containers details page. Clicking the "Add Miners" button will bring up a specialized transactional interface, designed to streamline the scanning process. You can lock and unlock different fields and navigate through the unlocked ones with tab and shift + tab keys. Tabbing while the last field has focus will actually input the miner info and return the focus to the first field to iterate, so you can operate quickly without leaving the keyboard. The entered info is displayed in a table you can proofread and edit inline before leaving.
From this view, you can move miners between containers too.
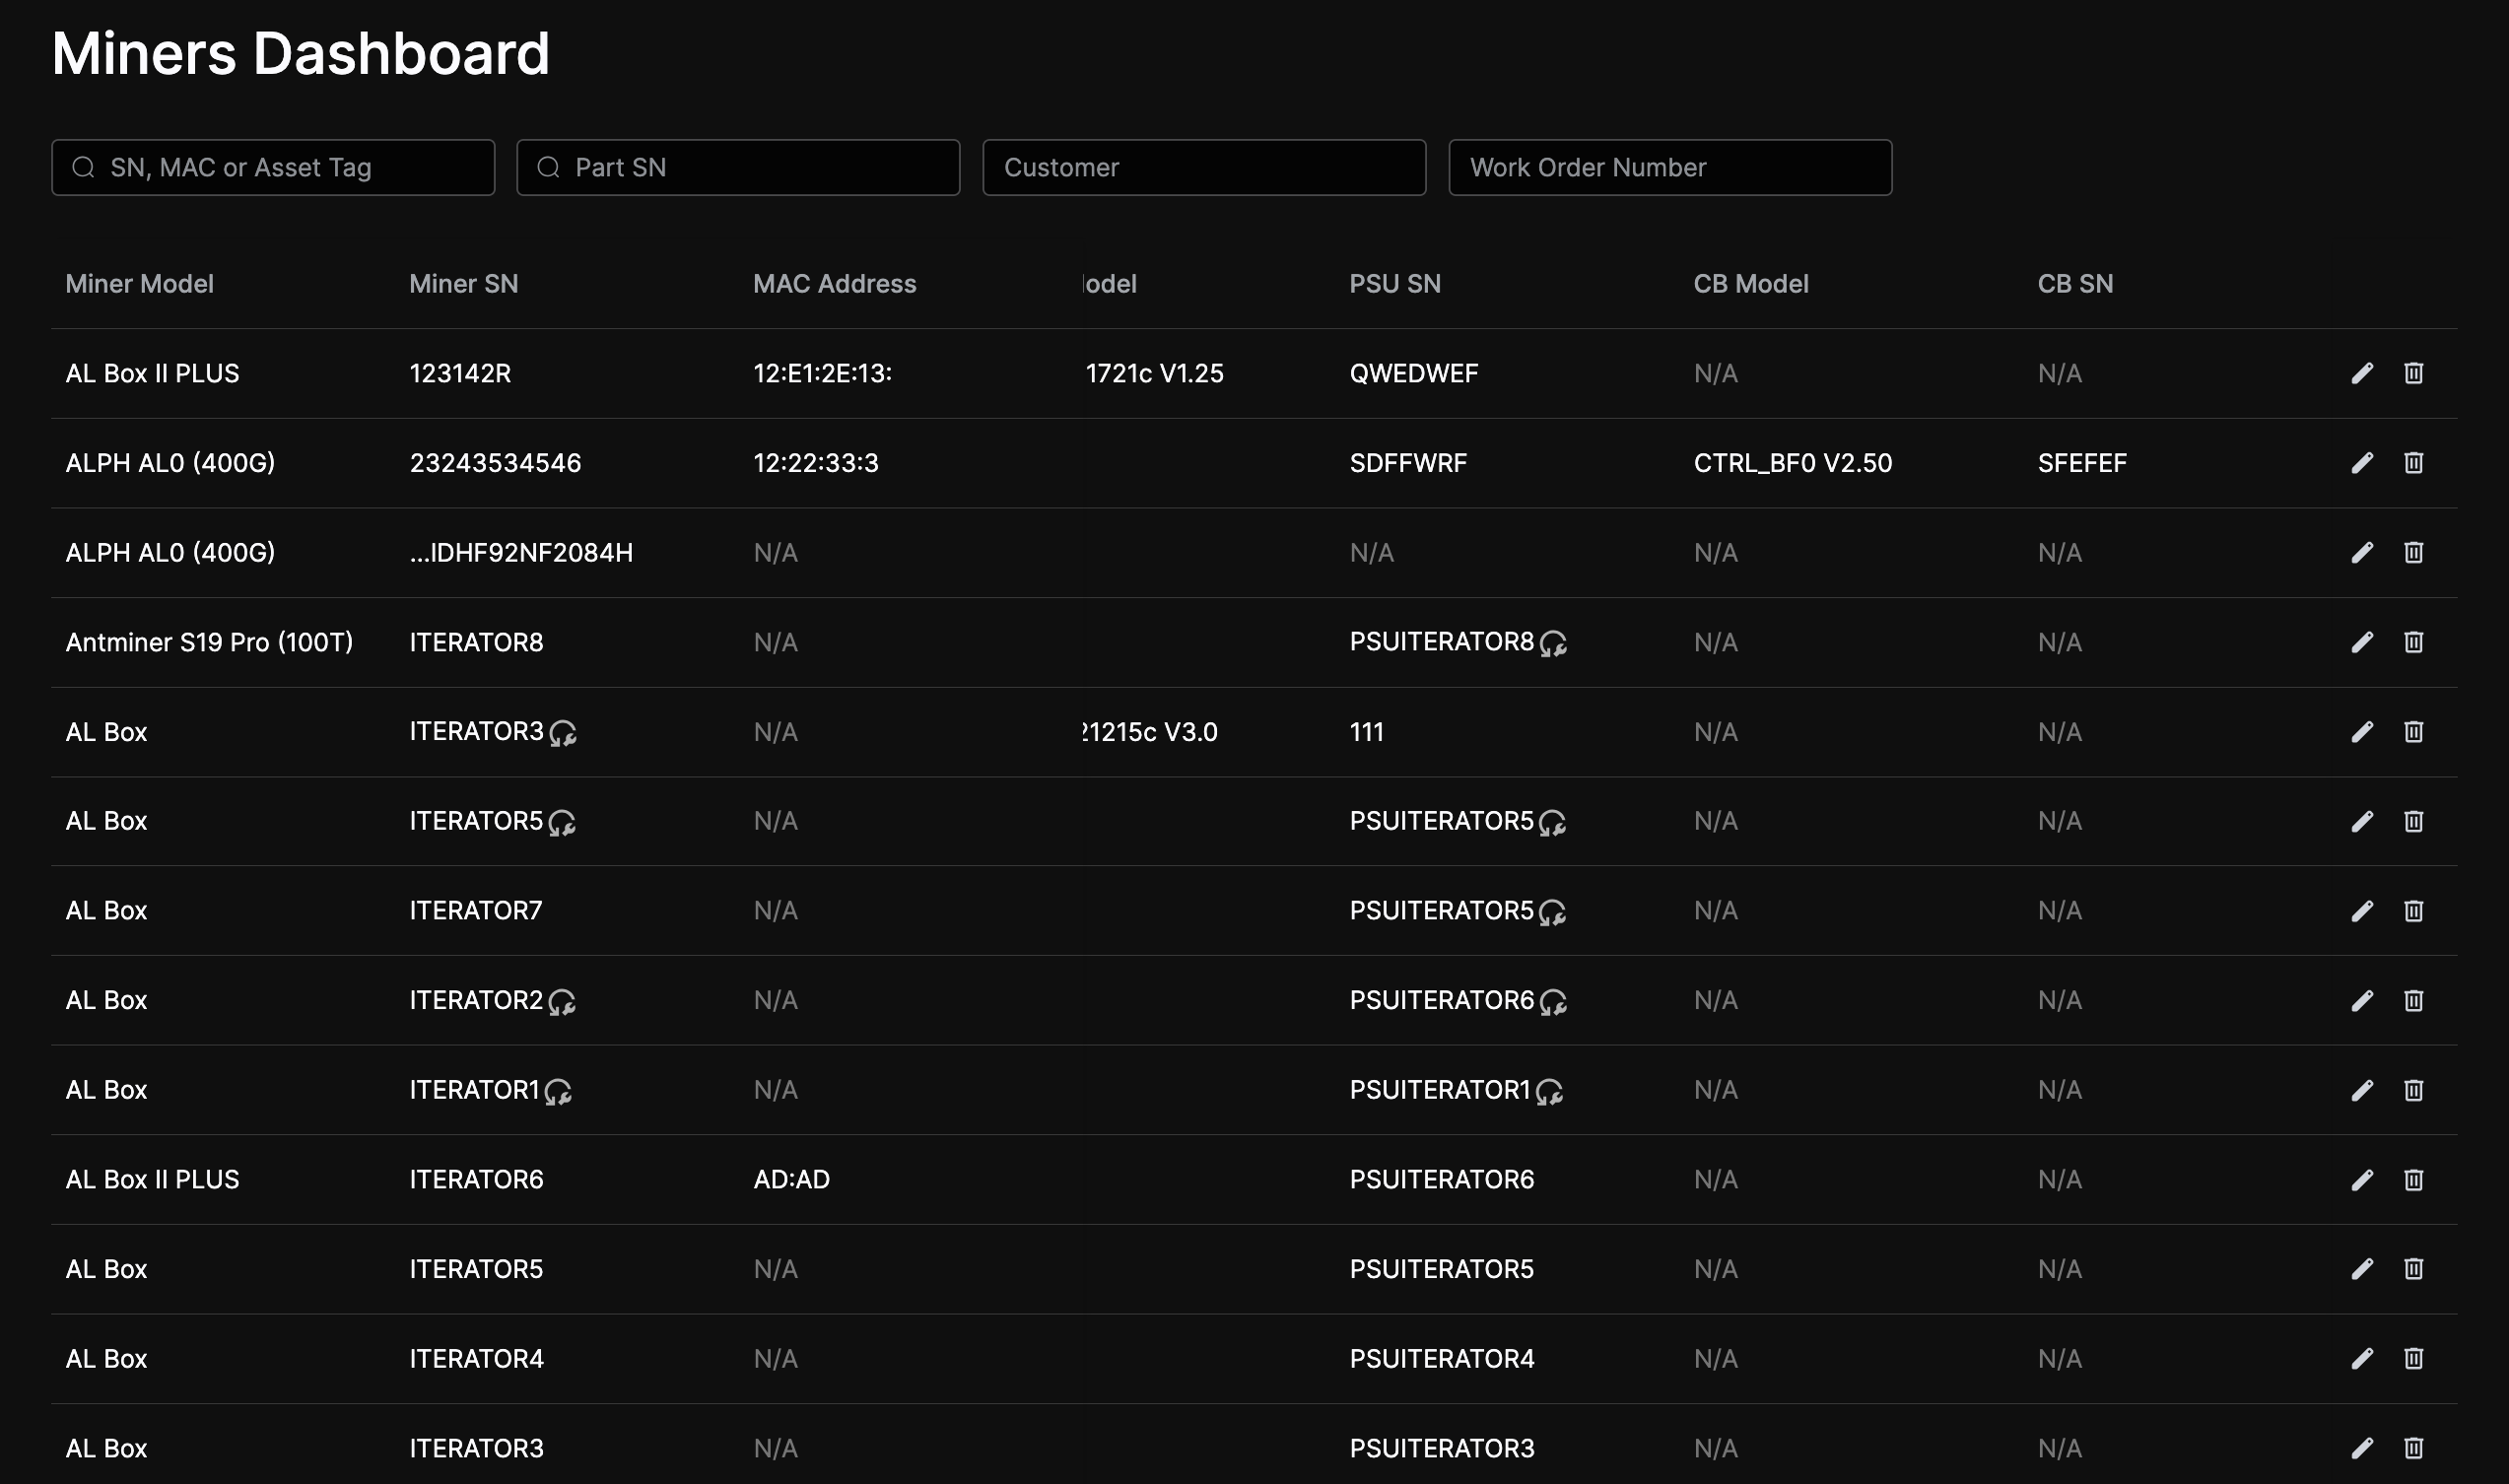
From the miners table you can edit any miner's model, SN, MAC address, PSU model and its SN, CB model and its SN, HB models and their SNs.
Note
A miner is created in the system with the Serial Number and the placeholders for the parts defined by the selected miner model. In order to create the specific part in the system (PSU, Hashboards, Control Board), the user needs to populate Serial Number and Model fields in the relevant placeholder for the part.
Clicking any row —be it from master miners table or from a container's mini-table— will take you to the miner details page, which is where most of the repair operations take place.
Identifying whether a miner, PSU, CB, or HB has previously been in the RC is critical for warranty tracking. If a repeated SN is detected, it'll get flagged with a icon. This is particularly important in the context of warranties.
You can also see and operate on the Work Order's miners from the Work Order Dashboard Miners tab.
Spare parts
The Spare Parts table is the inventory of spare parts owned by Repair Center or customers. You'll see the existing spare parts listed with their type, model, SN, status, owner, and location. The table also shows SNs of miners each part was removed from and used on (clickable to navigate to miner details), plus the originating work order, price and a link to its entire history. You can filter by most of these fields and edit spare parts inline.
Adding
Adding spare parts is done in a transactional view similar to the Miner scanning one, where you fill in an inline-editable table before committing.
You can also import from a CSV file. Download the sample file to know which fields to fill in and in which format.
Updating
Selecting rows will reveal bulk-actions buttons. You can bulk-update parts' owner, location, and price, bulk-delete parts, or flag used or broken parts as archived.
"Broken" company-owned spare parts can be flagged "Refurbished" by clicking the icon, which will transition them back to the "In Stock" status so they can be used. Refurbished parts will get the icon next to their status.
There is no Spare parts entry in the Repair Work Order Dashboard.