Operations
Diagnostics, Repairs, and Testing
Clicking a miner's row (from the Work Order summary, a container breakdown, or the master miners table) opens the repairs interface.
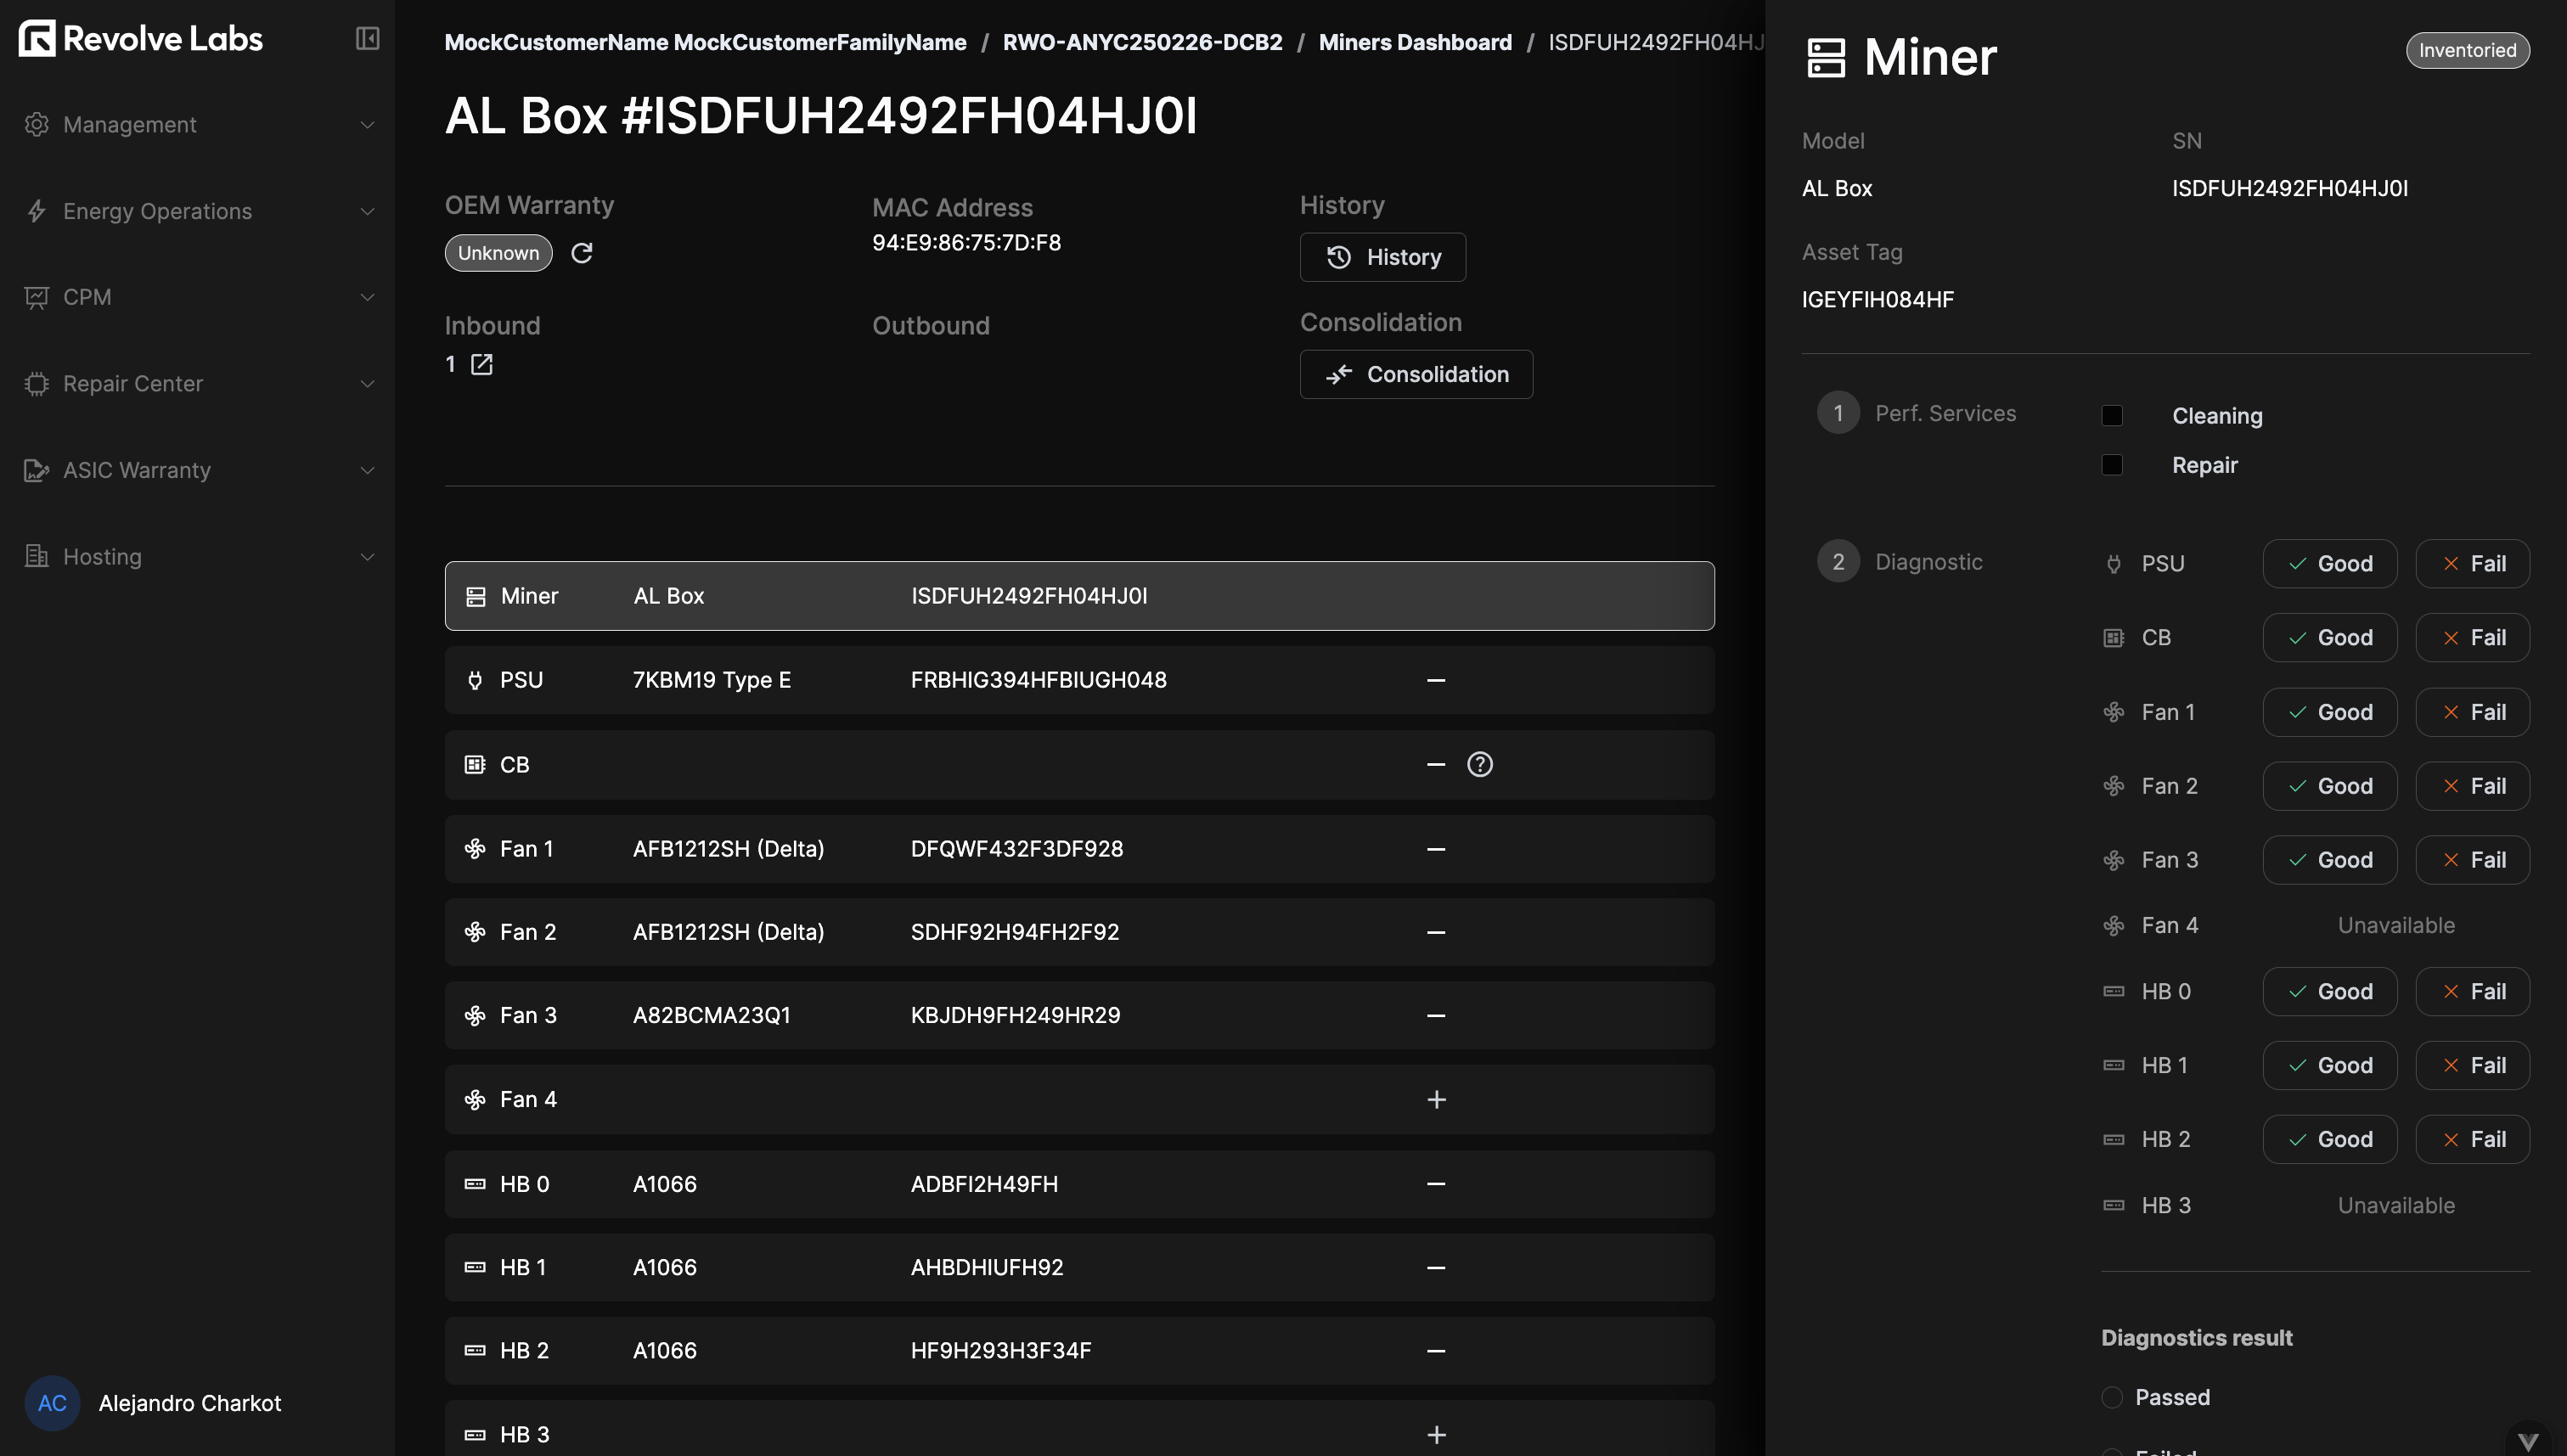
Details
The top section displays critical asset details.
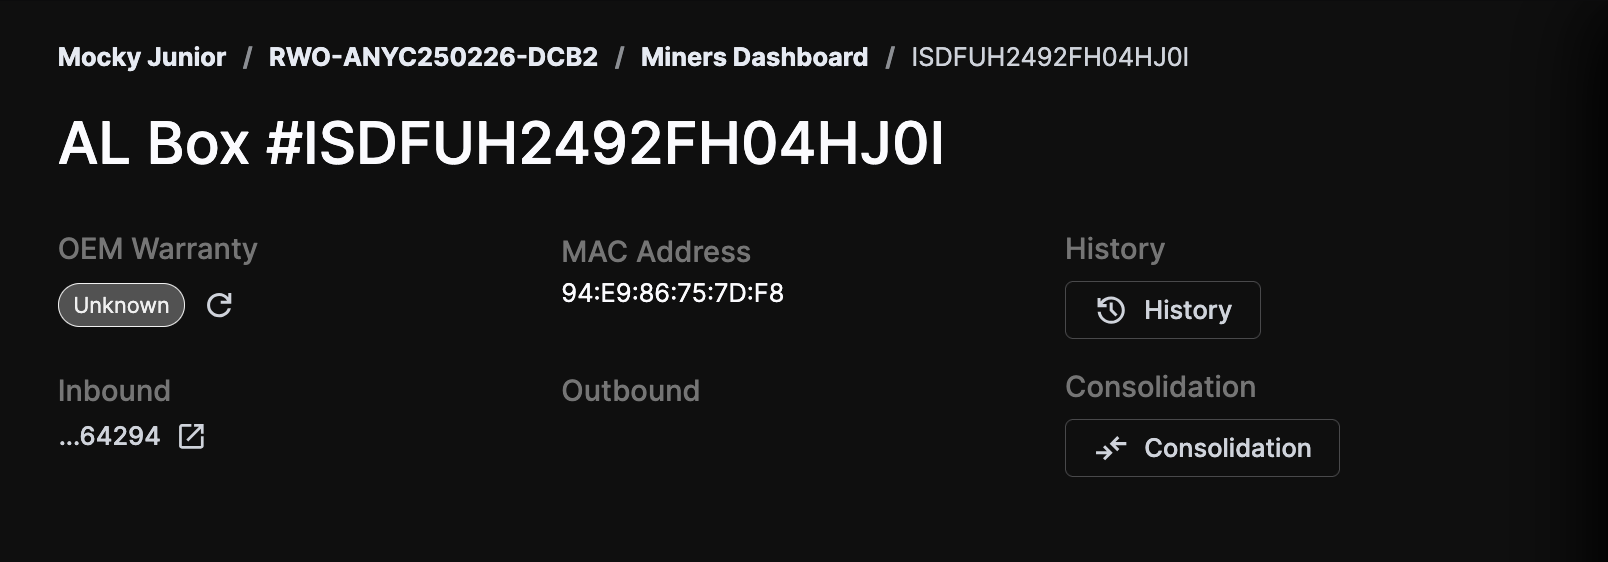
Key details include the miner's path (Customer / Work_Order / Access_point / Miner_SN), MAC address, links to inbound/outbound containers (if set), and the miner's OEM warranty status.
- Consolidation Shortcut: Jump directly to the consolidation screen.
- Update Warranty: Manually update OEM warranty status.
- History: Click the History button to view a modal listing all past actions performed on the miner.
Parts Index
The center column displays the parts index. Clicking any part (or the miner itself) updates the sidebar on the right to match the selected component.
This view also allows operators to report parts as missing or attach spare parts to available slots.
Miner Sidebar
When the miner is selected in the index, the sidebar provides controls for services, diagnostics, stress tests, status management, and notes.
ID Details
The top section displays status and ID details. Double-click any field to inline-edit the Model, Serial Number (SN), or Asset Tag.
Services
The Services section lists services defined in the scope of the originating Repair Request. Check the boxes to mark services as performed.
Diagnostics
Use the Diagnostics section to set initial diagnostic results for each part. While usually performed individually per part, this interface allows setting them in aggregate. Failure types are specific to each part type; if no matching failure is found, select 'Other' to provide a custom description.
Diagnostic results can include image evidence. Uploading a result automatically updates the miner's status to "Diagnosed".
Repairs
The Repairs section allows manual transition of the miner's status, provided all validation criteria are met. This is also where miners are declared "Completed".
Stress Tests
Create multiple stress test records as required. For failing tests, failure reasons must be provided.
Repair Notes
Record any necessary internal notes regarding the repair process.
Part Sidebar
When a specific part is selected in the index, the sidebar presents a specialized interface for that component.
Status and Damage
Set the part status using the dropdown menu. This syncs with the data presented in the miner view.
Damages can be recorded independently of failures. It is possible to have a functioning part with physical damage, or a failing part with no physical damage.
Repair Details
Once a failure is set, the repair interface appears. This section records repair actions (specific to the part type), allows image uploads, and captures notes.
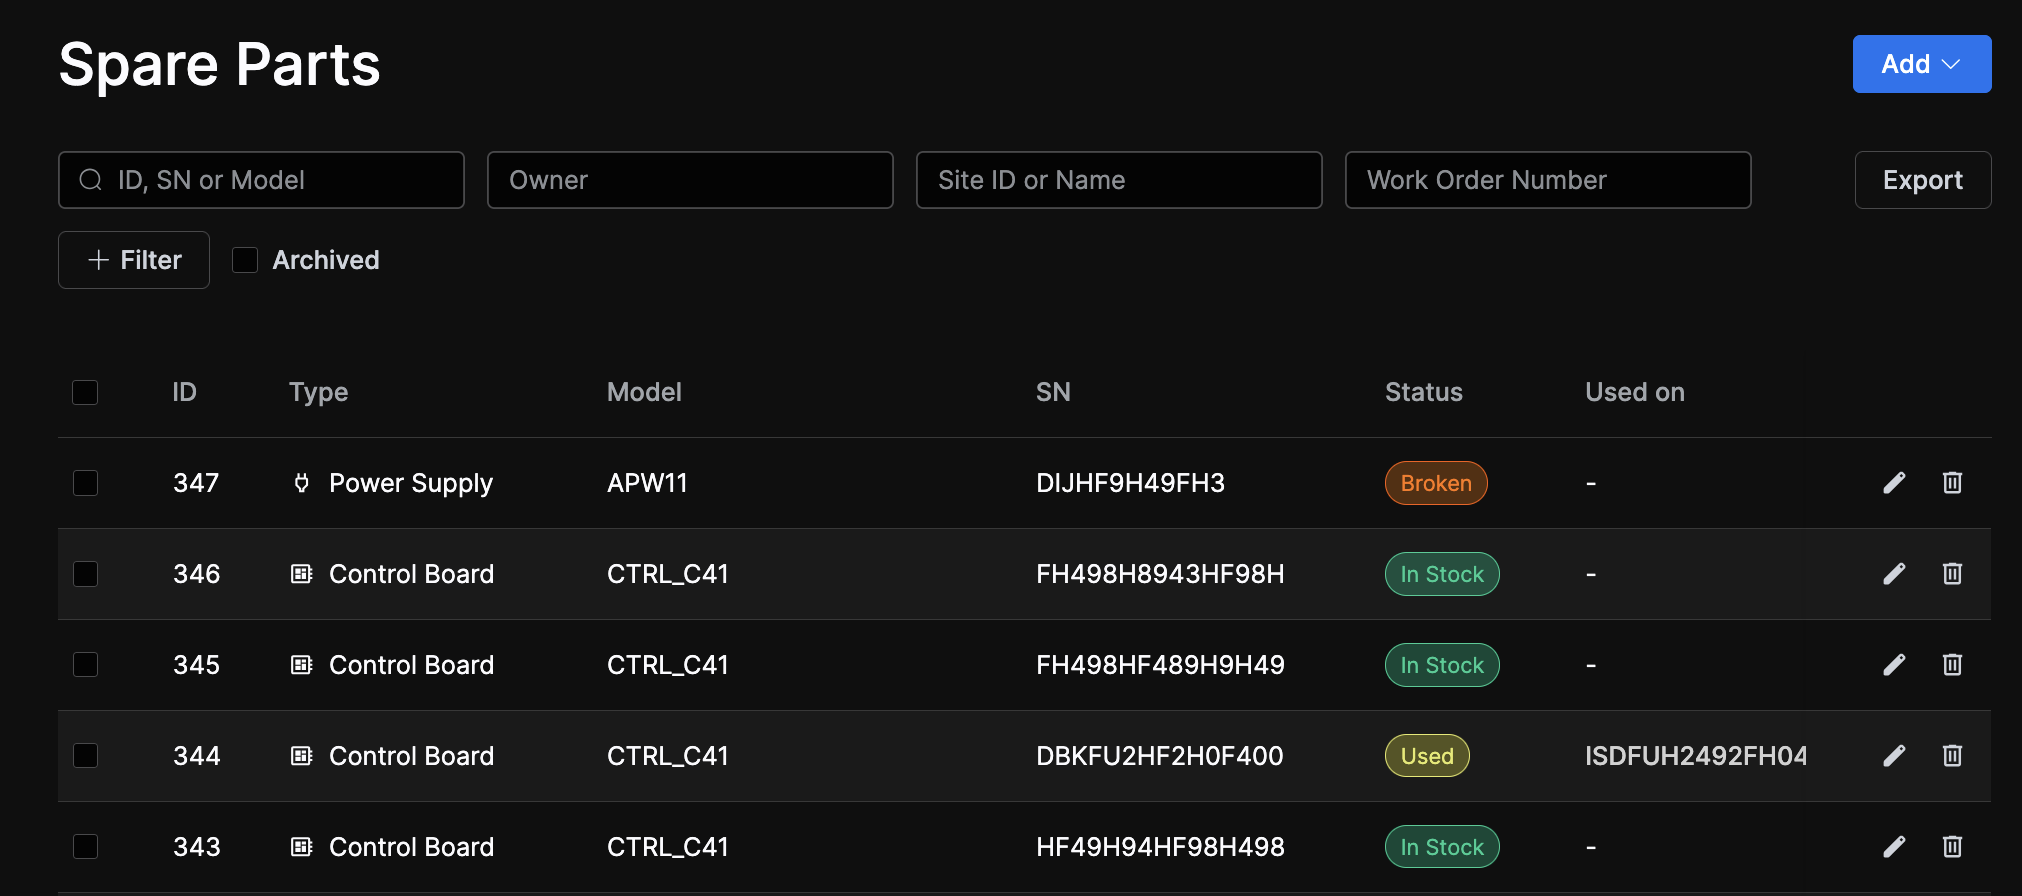
Replacements: A part can be replaced with a spare.
This action transitions the original part status to 'Replaced' and flags it as a "Broken Spare Part." This broken part can subsequently be archived or refurbished.
Requirements and Repair Charges
Parts are considered "unavailable" if they lack a Model or SN. If these were not captured during intake or scanning, they can be entered here.
Setting repair charges automatically updates the part status. These fields can be unlocked for manual management if necessary.
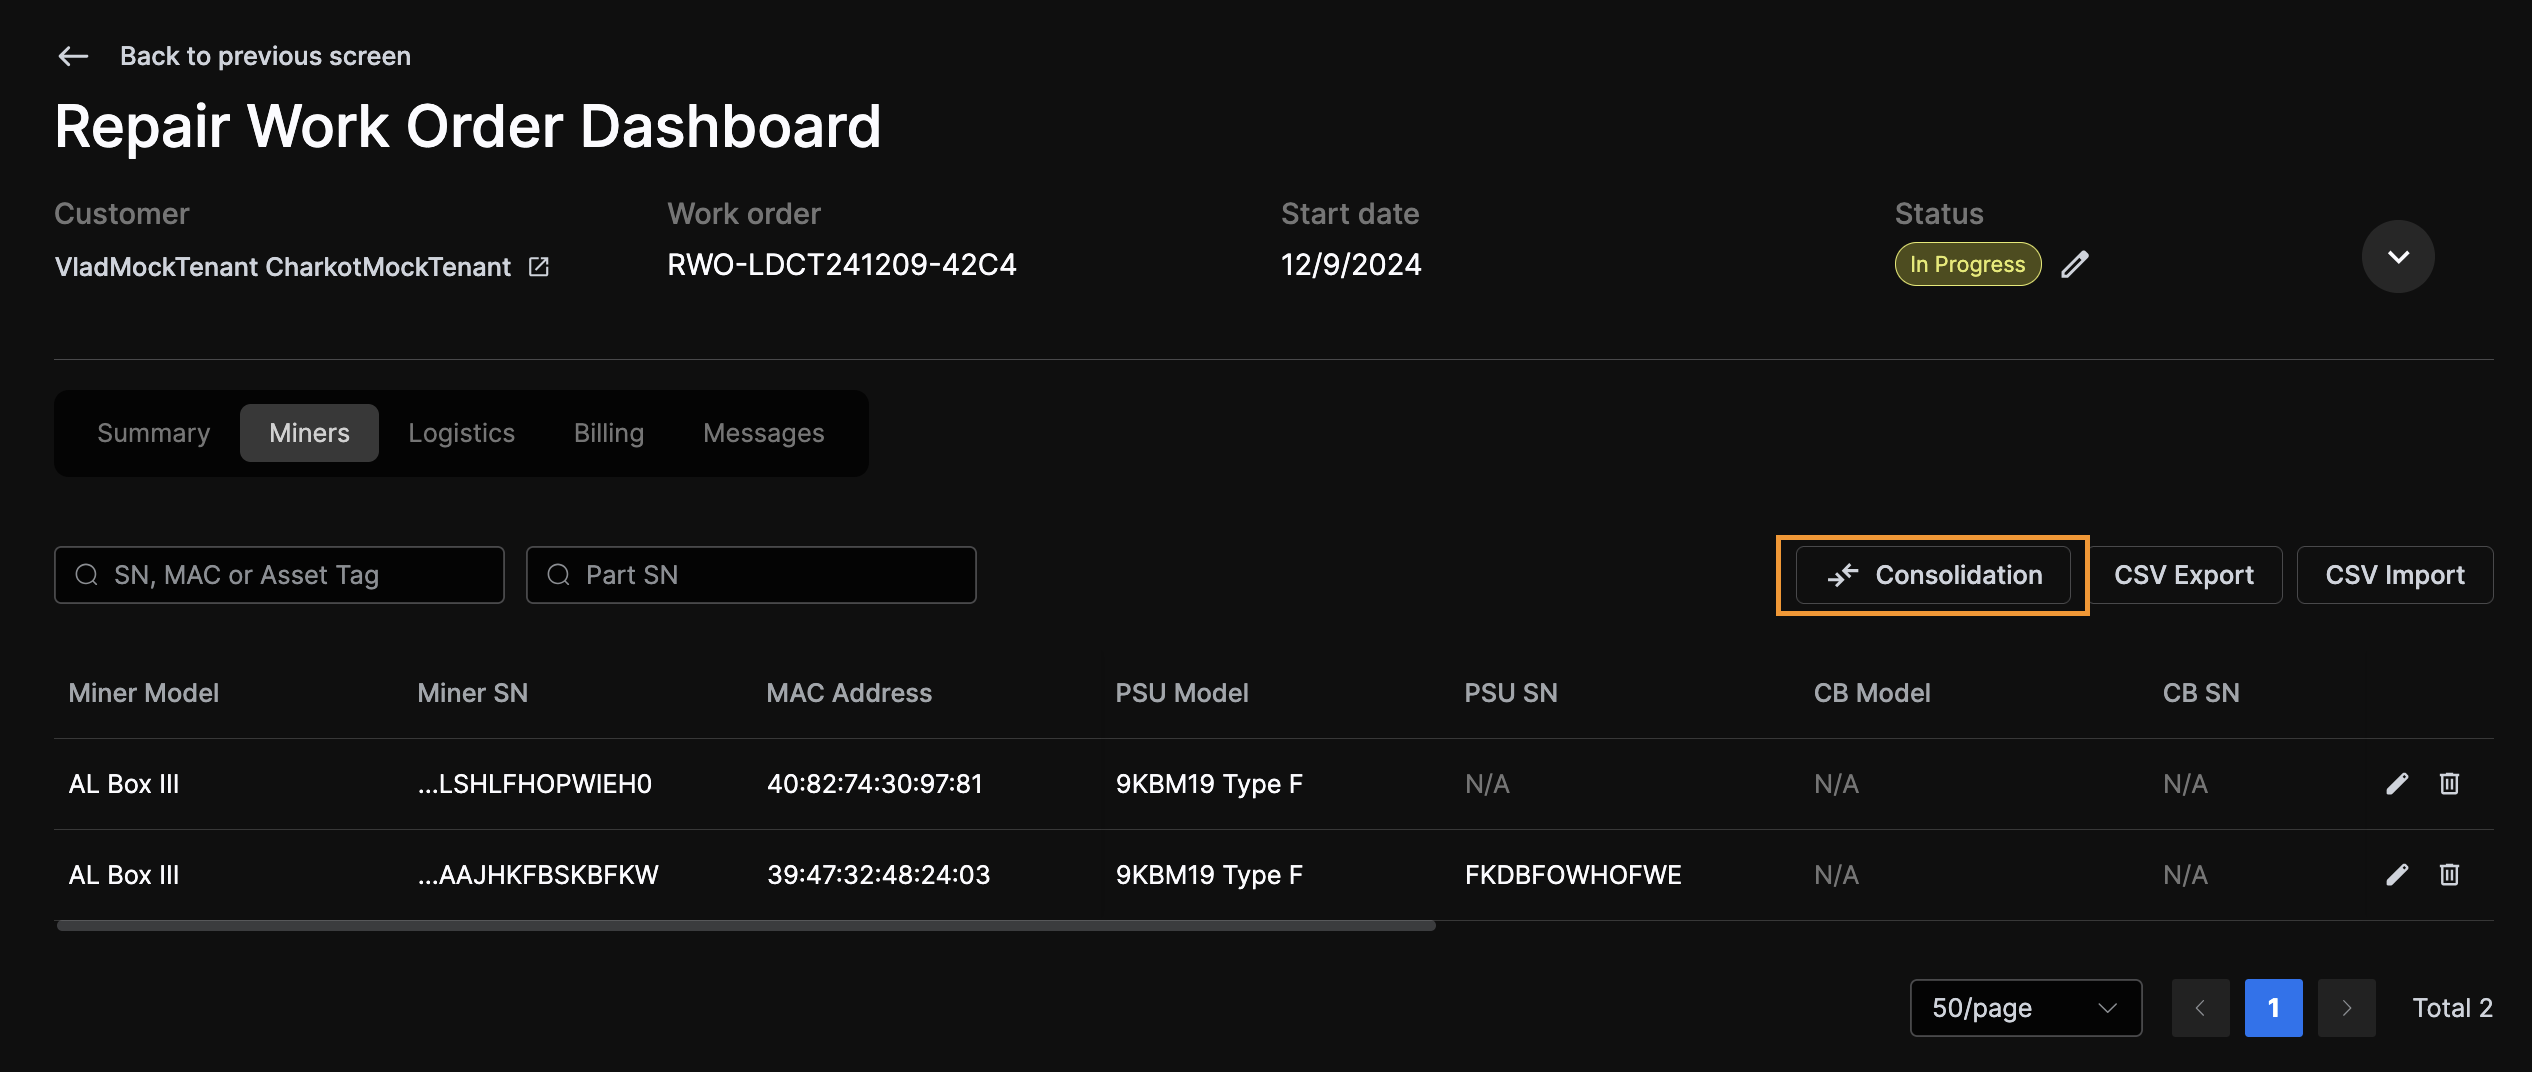
Consolidation
Consolidation is the process of swapping parts to assemble a functional unit from several partially failing ones.
The consolidation interface is accessible from three locations:
Miner Details Header:

Work Order Summary Table: (Select 2-3 miners to reveal the option)
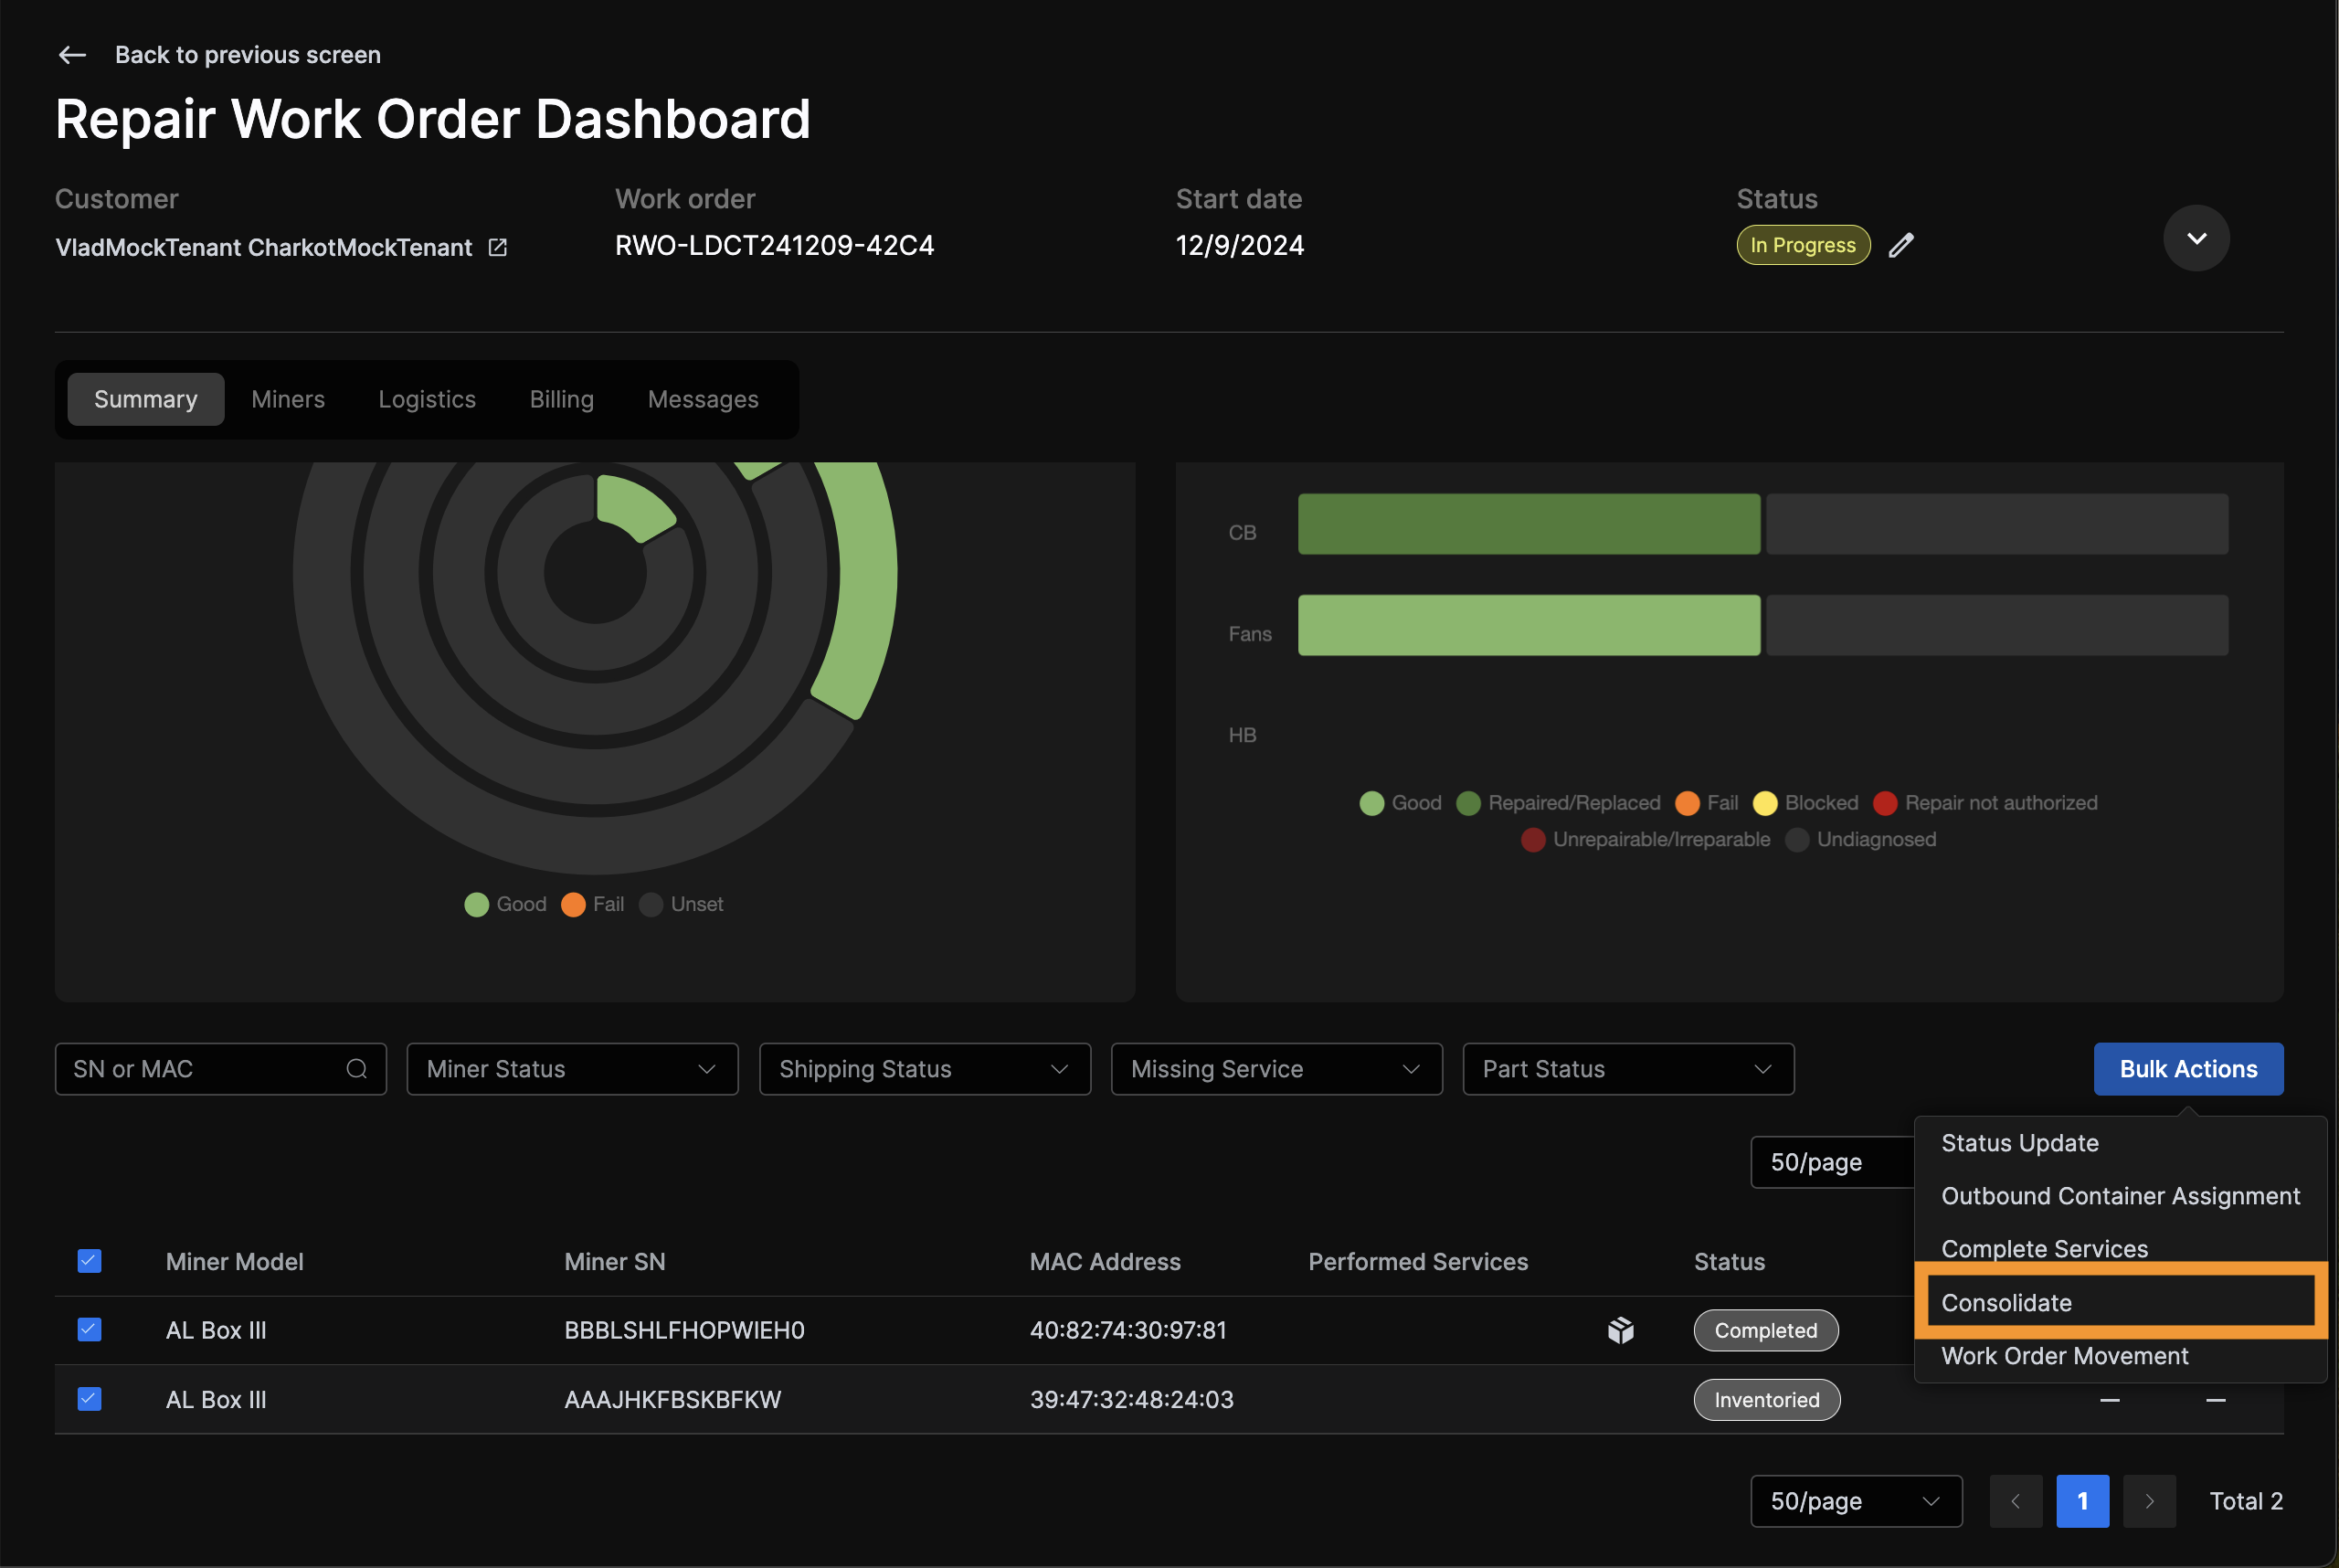
Work Order Miners Tab:
The interface displays miners in columns with rows representing slots and cells representing parts. Parts of corresponding types can be swapped between units.
Hover over the status icon to the right of each part to view status details.
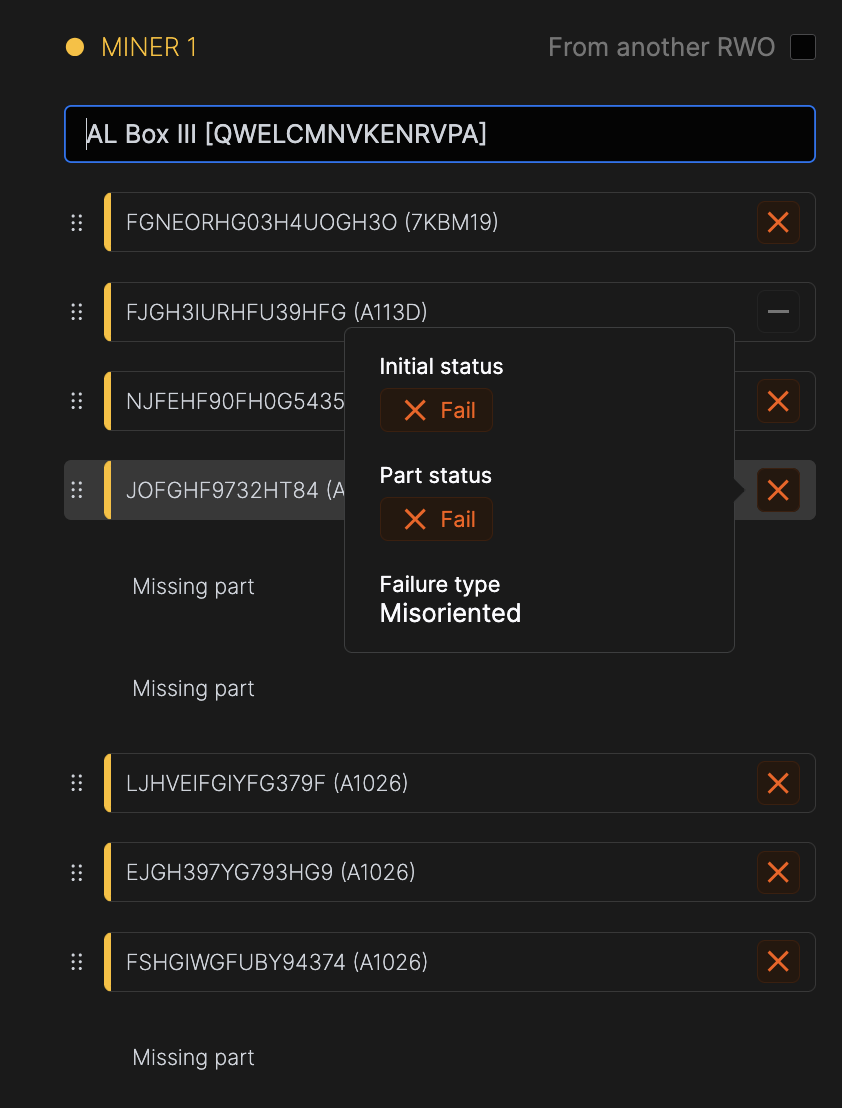
Admins can enable "From another RWO" to consolidate miners across different Work Orders.